Set up your church workspace
Bring your people over from a spreadsheet or another church system, invite your team and get ready for everyday work.
Importing, inviting and the setup checklist are available to the church owner and church-wide administrators.
1. Start from the setup checklist
Sign in, create or choose your church workspace and open Overview. Make this workspace yours lists five steps and ticks them off as you go: add or import your people, invite your team, review your apps and campuses, and create your first prayer or care record. Hide checklist removes it from this browser when you no longer need it.
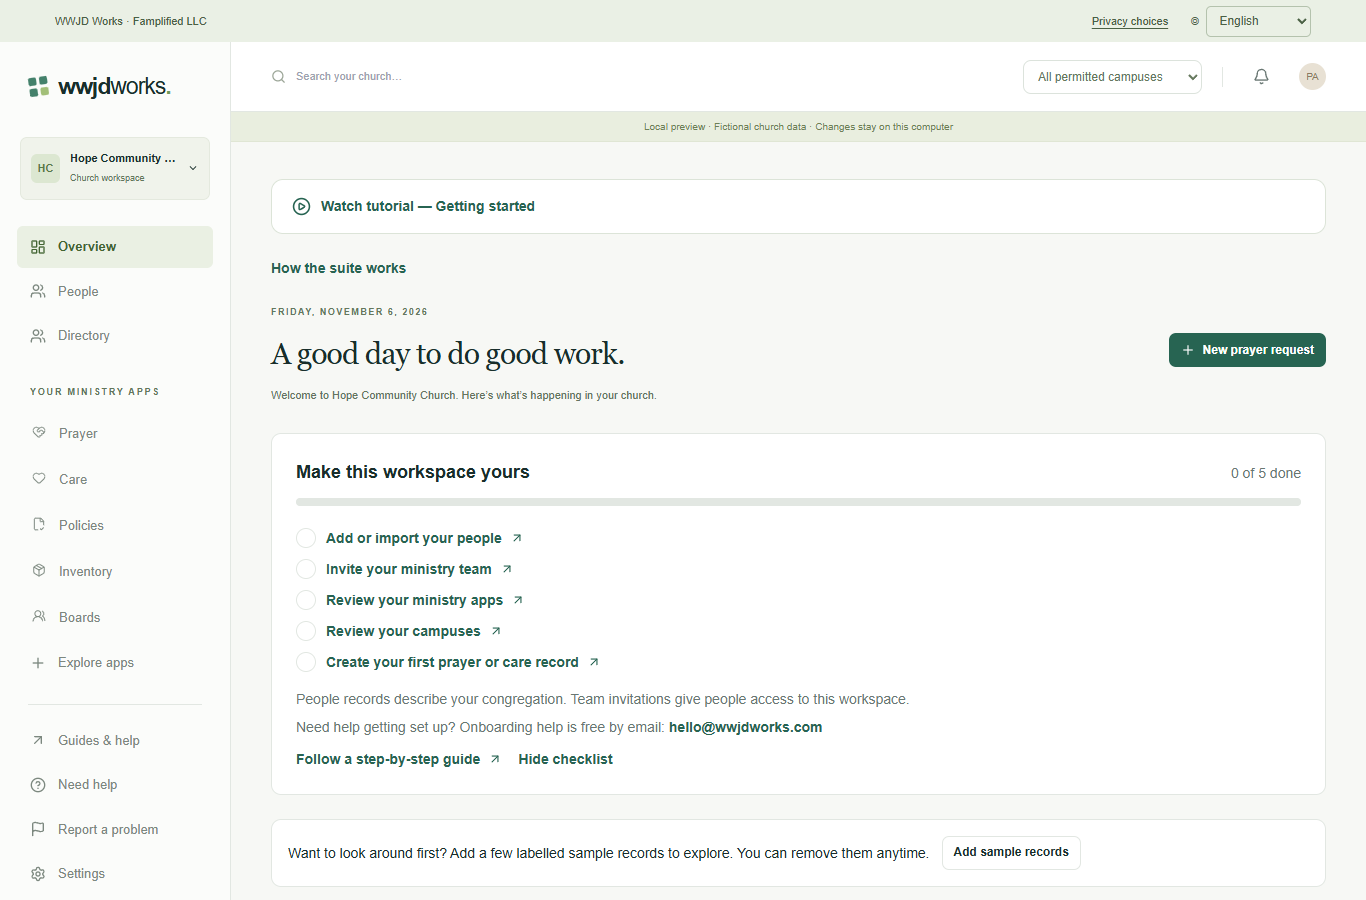
Setup checklist on Overview · English interface shown with fictional training data. Select the image to enlarge. 2. Look around with sample records (optional)
Before your own records are in, select Add sample records on Overview. A few fictional records marked “Sample” appear in Prayer, Care and Inventory, for the apps your church uses, so you can see how each one works. Select Remove sample records when you are ready. Any sample record you edited, attached a file to or linked from another app is kept.
3. Export a CSV file from your current system
In your current church software or spreadsheet, export your people list as a CSV file. Most systems have Export or Download on their people or contacts list. Keep the first row of column names. Export one file for each kind of record: people first, then prayer requests, care cases or equipment if you track them.
There is no file size limit. If you are starting from scratch, Download column template in the import window gives you a file with the right columns.
4. Import and match your columns
Open People and select Import. Choose the Import campus, then choose your CSV file. Under Match your columns, WWJD Works suggests a field for every column it recognizes, including common names from other systems and Spanish or Portuguese names. Check each one, change it if needed, or choose Skip this column for columns you don't need. Every record needs a name, or a first and last name. Addresses, birthdays, gender, a second email and phone, membership stages, tags and your own People fields can come over too. Columns that will not be imported are listed, and a column you have no field for can become a new text field. If dates are written like 5/4/1980, choose whether the month or the day comes first.
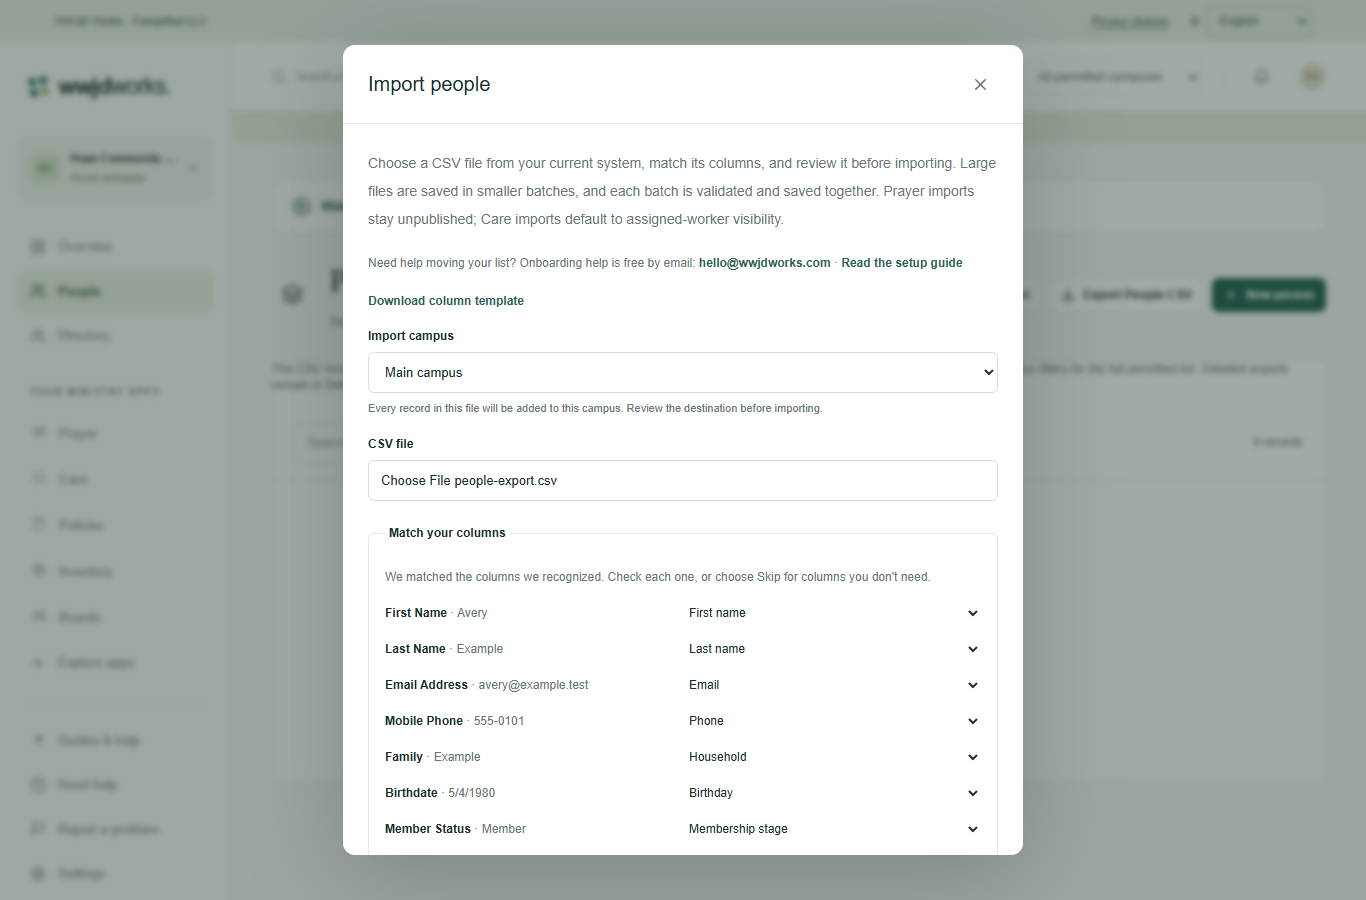
Matching the columns of an exported file · English interface shown with fictional training data. Select the image to enlarge. 5. Review problem rows and duplicates
Before anything is saved, rows with a missing name, an email that does not look right, a date not written as YYYY-MM-DD or a value that is too long are listed by their row number in your file and skipped. For People, rows whose email matches someone already in your list or an earlier row are listed too and skipped unless you clear Skip these rows. Check the records ready for review, then select the import button, for example Import 3 records.
Large files are saved in batches. If the connection drops, the window tells you which rows it knows were saved. Check your People list before importing the rest, so nobody is added twice.
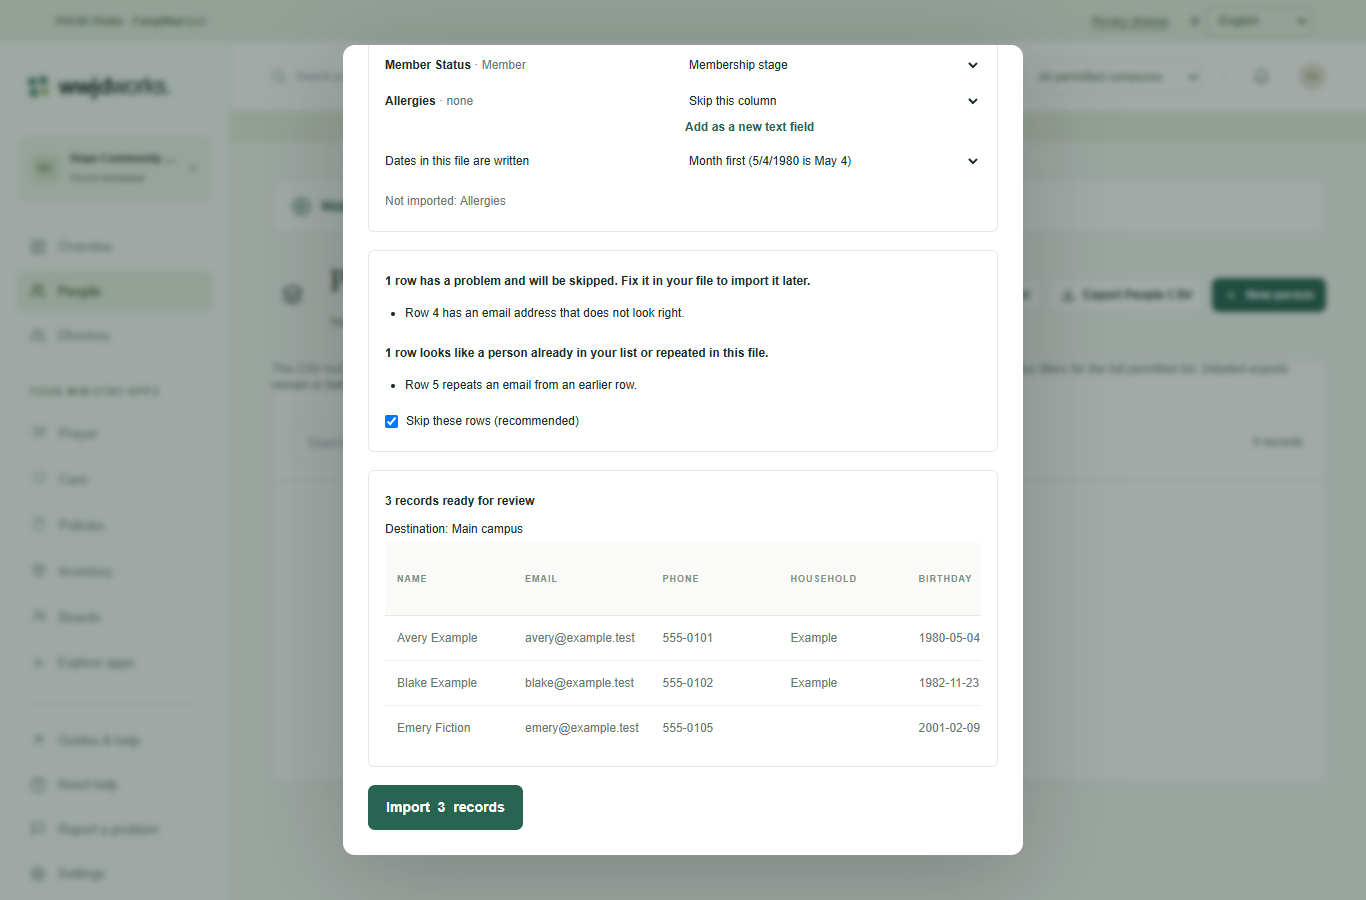
Problem rows and likely duplicates are skipped · English interface shown with fictional training data. Select the image to enlarge. 6. Create households, or undo the import
When the import finishes, the window stays open. If your file has a Household or Family column and Directory is available in your workspace, select Create households to group people who share the same value. If something looks wrong, select Undo this import, then Delete them. Undo removes only the records this file created and any households made from them, and only until you close the window and while nothing else in the workspace has changed. Select Done when you are finished.
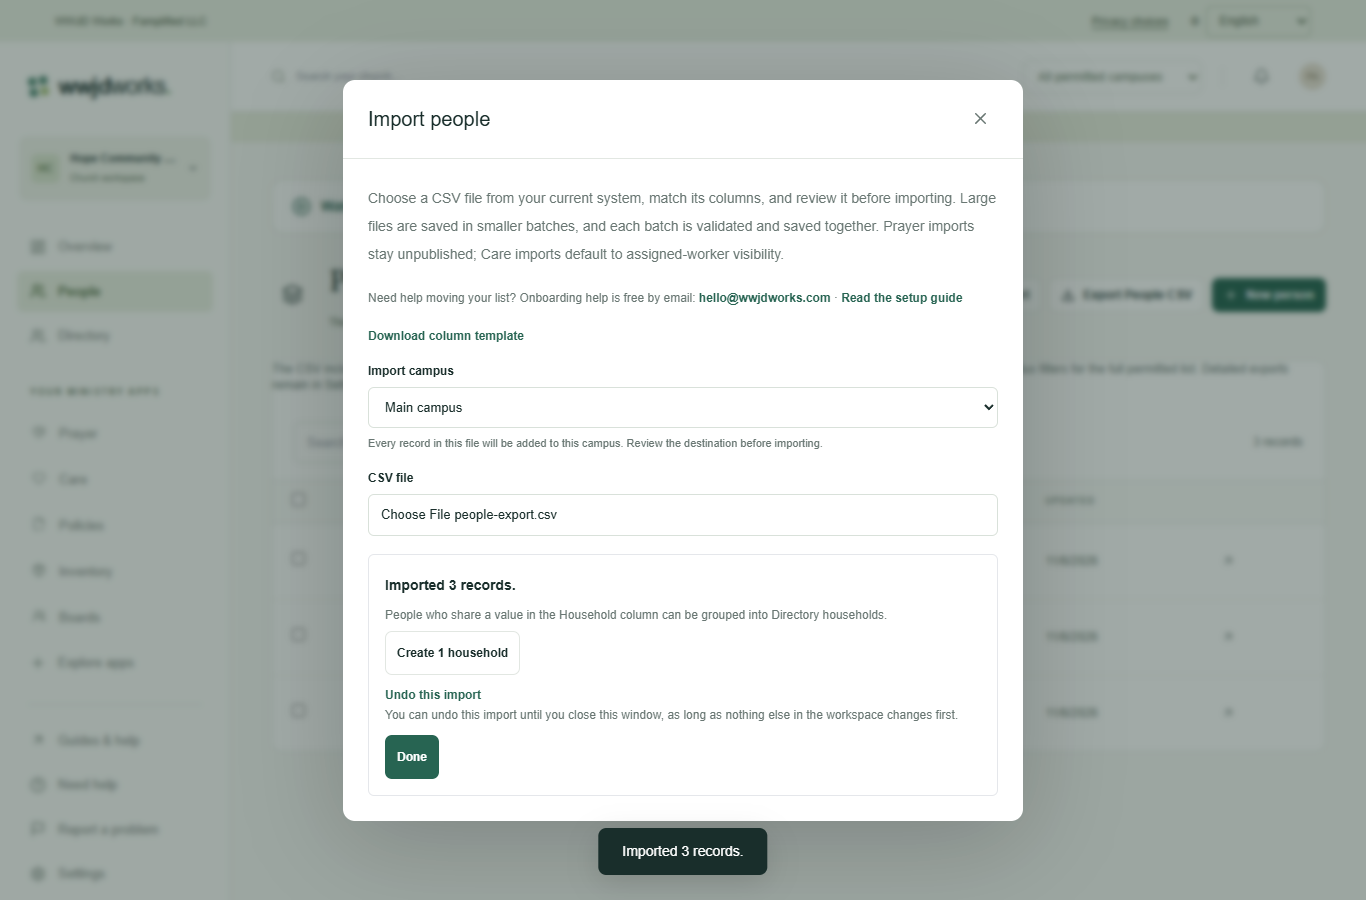
After the import: households and undo · English interface shown with fictional training data. Select the image to enlarge. 7. Import prayer, care and equipment records
Prayer, Care and Inventory have the same Import button and the same checks. Imported prayer requests stay unpublished, and care cases start visible only to the assigned worker and administrators, so nothing private is shared by accident.
8. Invite your team
Open Settings, then Team & permissions. Under Invite someone in, enter up to 20 email addresses separated by commas or new lines, choose the role and access, and select Send invitations. Everyone in one batch gets the same role, so send separate batches for different roles. People already on your team or already invited are skipped. Invitations expire in seven days.
A person record in People is separate from a team sign-in account. Importing people never invites them or gives them access.
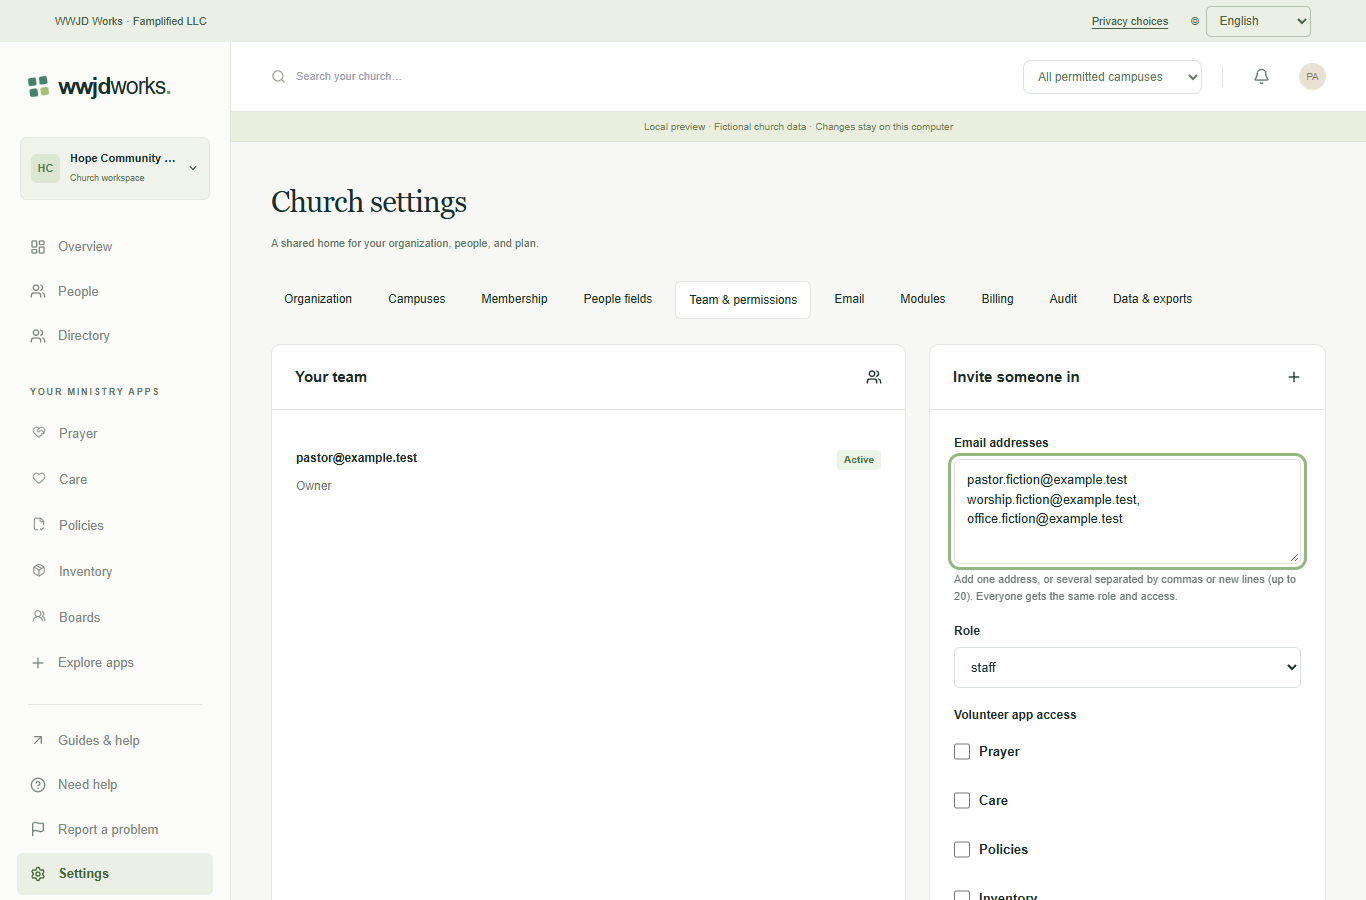
Inviting several team members at once · English interface shown with fictional training data. Select the image to enlarge.
Need help moving your records?
Onboarding help is free by email. Tell us which system you are moving from and the step you are on. Please keep private ministry details out of your message. hello@wwjdworks.com